
Set Up Your Pic-Time Print Store in Under 10 Minutes
A gallery print store is one of the most impactful tools for creating the best experience for your clients while helping you make the most of every photoshoot.
Integrated directly to your galleries, the Pic-Time store enables clients to easily print their favorite images on a variety of high-quality products or download them as digital files.
Tens of thousands of Pic-Time photographers have already discovered the value of their Pic-Time store and by going through a few basic settings you can have yours ready in no-time.

Pic-Time Store Basics
The Pic-Time store is already set up with default settings that provide both your client and you a seamless experience. We’ll walk you through these settings plus a few basic decisions you need to make to have your store ready to share (and sell) in minutes.
Step 1: REVIEW YOUR Basic Account Settings
Basic set up time: 2 min
Parts of your store will be connected to your basic account settings, so before you set up your store, it’s important to verify that those are up-to-date. In your account dashboard, select Settings and click on Profile.
Address - Double check that your address is correct.
Preferred Language - Check your default language for all galleries. The store will immediately be displayed in that same language.
Timezone - Setting the correct timezone for your key audience is very important. It ensures that future marketing emails and client discounts will be sent out at the right time.

step 2: SET UP Store Products AND PRICING
Basic set up time: 5 min
This is where you will control your pricing and profit margins as well as set up Price Lists for your galleries. In your account dashboard, select Settings and click on Store Pricing.

Think of a Price List as a custom store that you can set up for a specific audience or location. Each price list can include a different lab fulfiller, markups and product selections and be attached to different galleries.
If you are just starting out, we recommend selecting your preferred lab and using one of our pricing presets.

How to Create a New Price List
1) In the Store Pricing tab, click on Edit Price List. Then select Add More.
2) Give it a name
3) Select your lab fulfiller/s for that list
Pic-Time is partnered with over 30 worldwide, high-quality labs that are integrated within the system for an automated process from order to print. Even though you can add several labs to each Price List, we suggest keeping it to a maximum of one or two per list in order to reduce shipping costs for your clients. Keep in mind that not all labs carry the same product selections. You can learn more about our labs here.
4) Choose recommended markup
Pic-Time’s recommended markups have already been optimized for store users so you can earn money right from your first sale. For your basic setup, we strongly recommend using one of our recommended markups within each pricelist.

step 3: DECIDE ON Store Settings
Basic set up time: 3 min
A few basic decisions you make here will help get your store up and running. Go to Settings in your dashboard, then select Store Settings.
Collecting Payments
Under Payments, you can choose one of two options for handling payments in your store. Your store will already be set with a default of Pic-Time Collects, but you can easily edit that by clicking on Setup.
Pic-Time Collects
This is already set as the default option in the store and is the simplest choice for first store sales. All you will need to do is add your PayPal email address, and Pic-Time will handle the rest. This includes the sales tax and payment to the lab for a hassle-free process.
USD will be the only available store currency in this option. It also includes a commission depending on your plan to cover the processing fees and sales tax.
Collect Payments by Yourself
If your main client base is outside the US or you are dealing with other currencies, this is an option you might prefer. Here there are several payment gateways available for you to choose from, including PayPal, Stripe, Square, or offline methods and no commission taken by Pic-Time.
This option is available for photographers on the Professional and Advanced plans only. You can always adjust this selection as you go. To learn more about both of these options, click here.

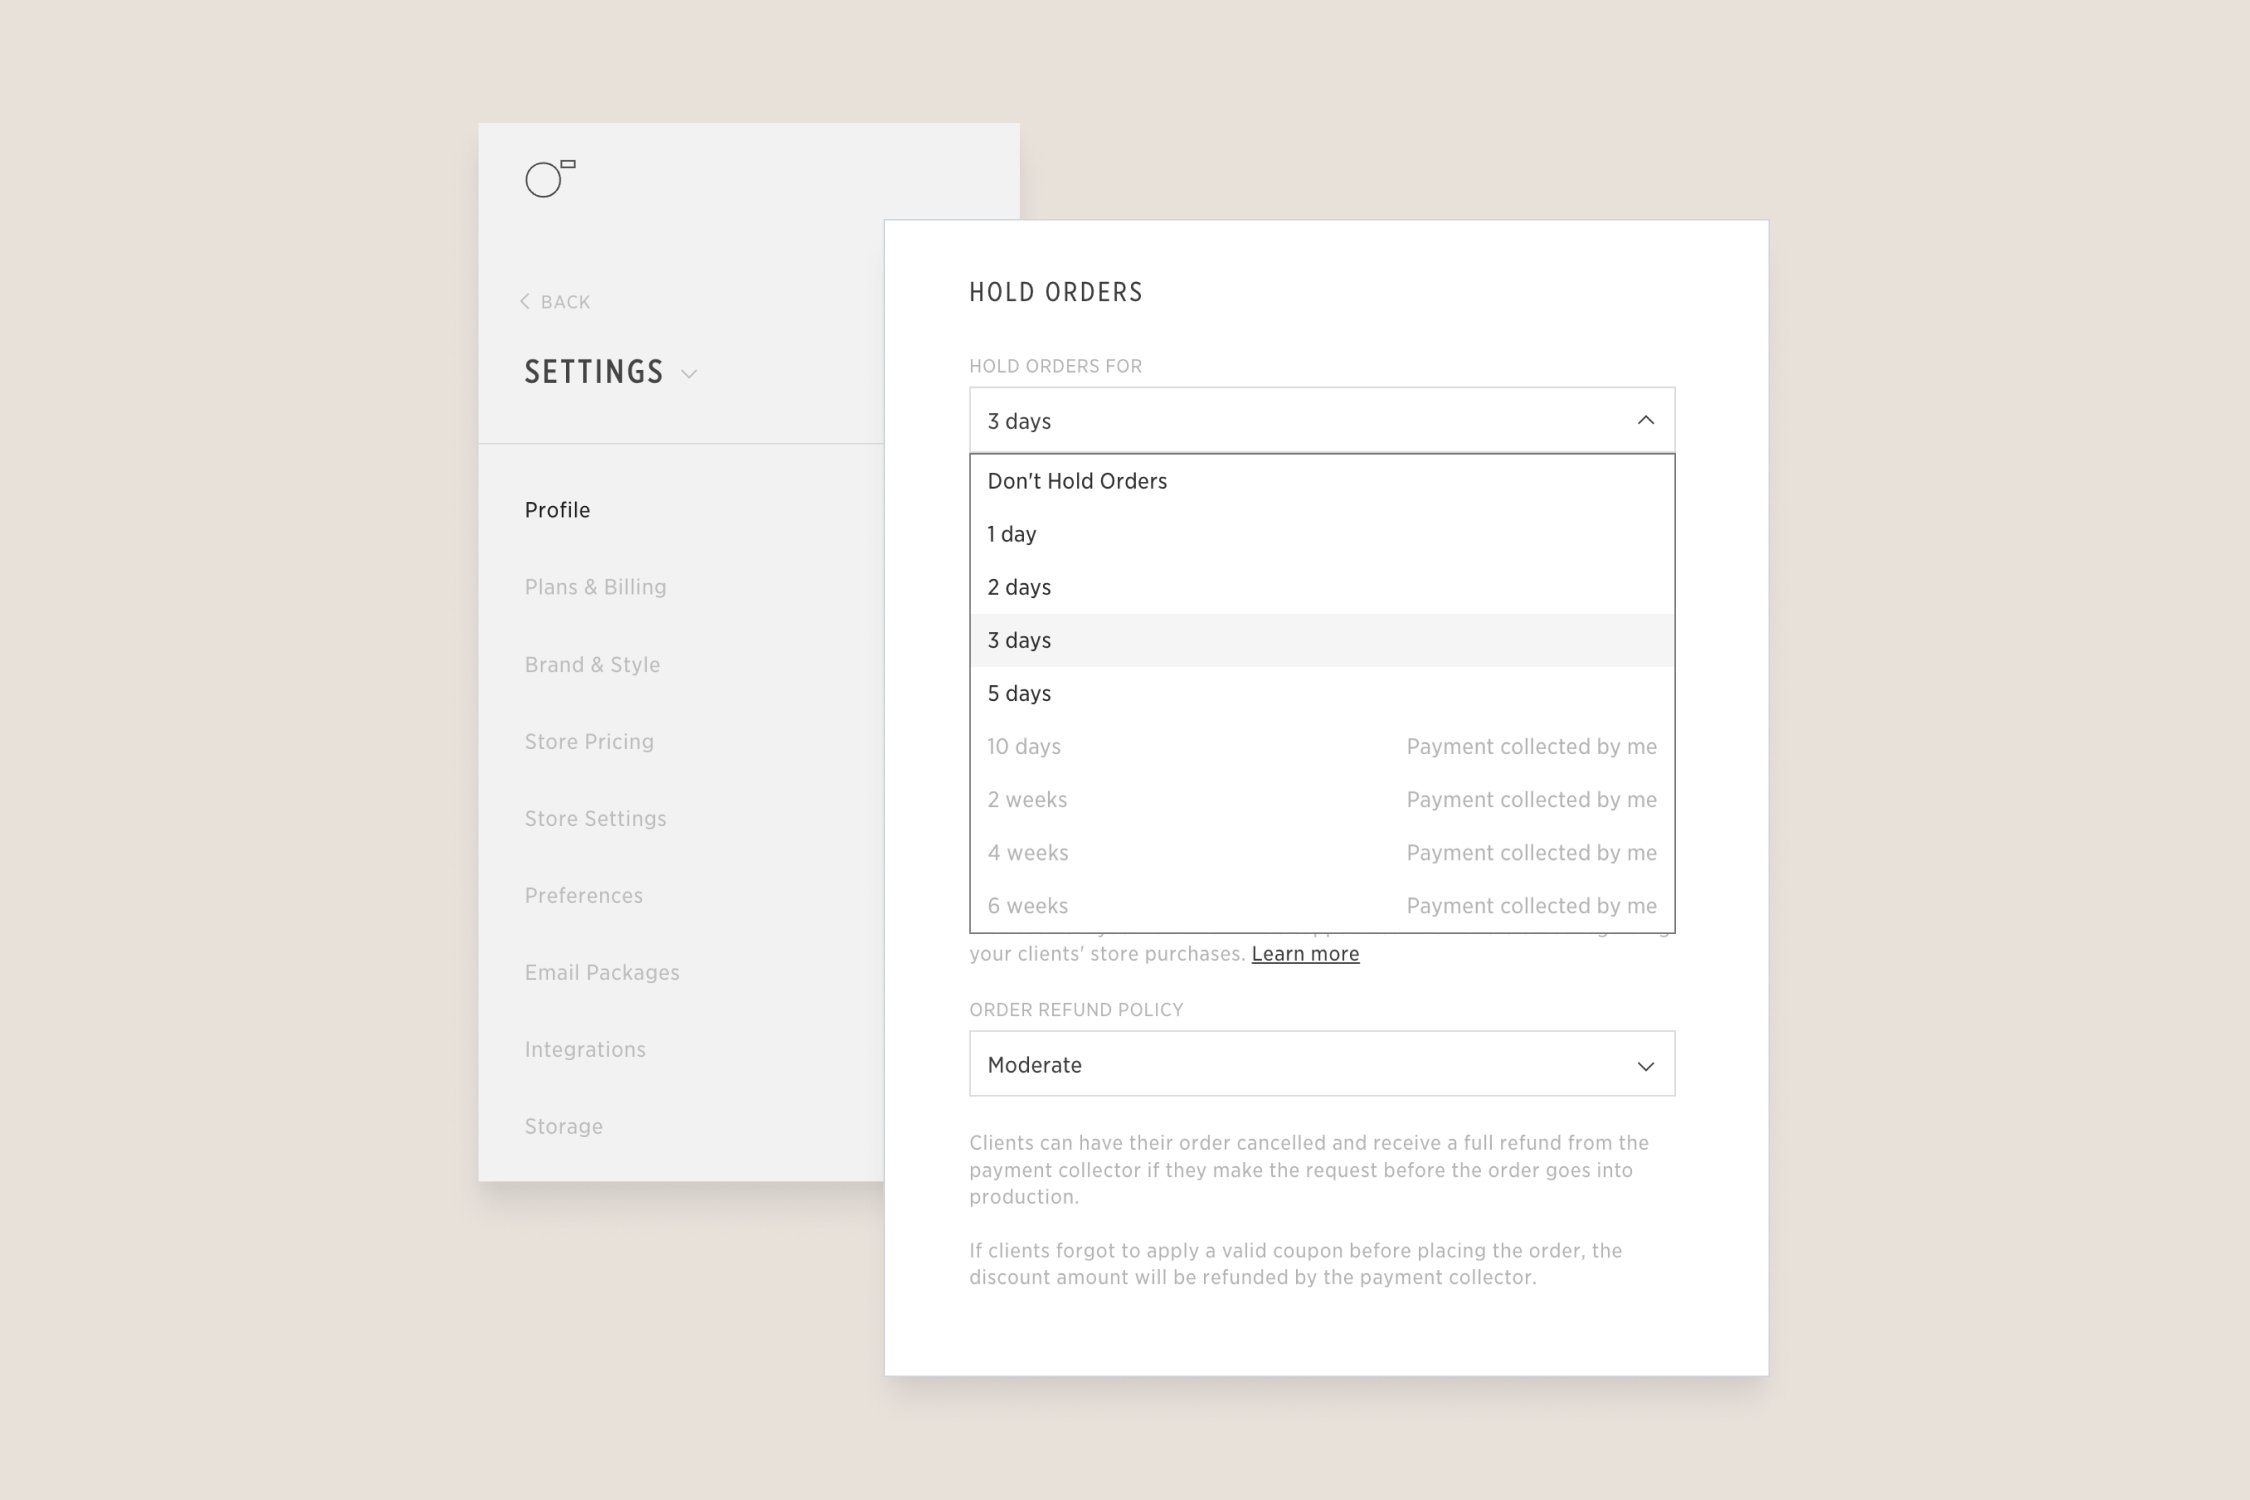
Hold Orders
We suggest all first time store users enable the Hold Orders option. Setting a hold on orders enables you to review them before they are sent to production. While an order is on hold, you can adjust the cropping of the images and make sure the correct images were selected for the order. After the hold period is up, the order is automatically sent to production. Learn more about that here.
And you’re ready for your first store sale!
The Pic-Time store is a great way for you to generate more income while inspiring your clients to enjoy their special moments in print. We hope this guide answers any questions you may have and helps you set up your store with ease.
More Fun store Facts
Customer Service
Whether you need technical support for yourself or your clients, Pic-Time’s online support is available 24/7! If you have questions about features, want guidance, or seek business optimization advice, our responsive support team is available around the clock to provide solutions and peace of mind.
Album Builder
You and your clients can effortlessly create and design a full artisan album right from the gallery. Our AI system selects the 'most engaged' photos from the gallery and crafts a stunning color scheme based on them. The album is ready for your client's personal touches before they order it.
Marketing Automations
Pic-Time’s marketing automations has defined a new way of selling prints online. Our automations include ready-to-go marketing campaigns with email sequences, and gallery & store banners to encourage clients to order print products, raising your revenue from each shoot.

